
DIY Terrace Waterproofing: How to Stop Roof Leakage by Yourself
DIY Terrace Waterproofing Easy & Cost Effective
Fix terrace leaks easily with our DIY tips and the right materials. We help you find the cause and provide lasting solutions.
DIY Terrace Waterproofing: How to stop leakage from Roof
Terrace waterproofing is the best way to protect your home from water damage, cracks, and mold. If you want to save money and get professional results, this guide will show you how to stop leakage from roof effectively by yourself.
Professional Results at a Lower Cost
By using Waterseal PSv, you don’t need to hire expensive experts. Any local painter can do the job perfectly if they follow the right steps. This method is much cheaper than market rates and provides long-lasting protection.
Note: To ensure the best quality, do not leave everything to the painter’s judgment. You should supervise the work personally and make sure our instructions are followed strictly.
Why DIY Terrace Waterproofing is Important
Over time, terraces develop cracks and absorb moisture, allowing water to seep through. Waterproofing your terrace can:
Prevent leaks into ceilings and walls
Extend the lifespan of your terrace and structure
Avoid expensive future repairs
Materials for DIY Terrace Waterproofing
Before starting, gather the following:
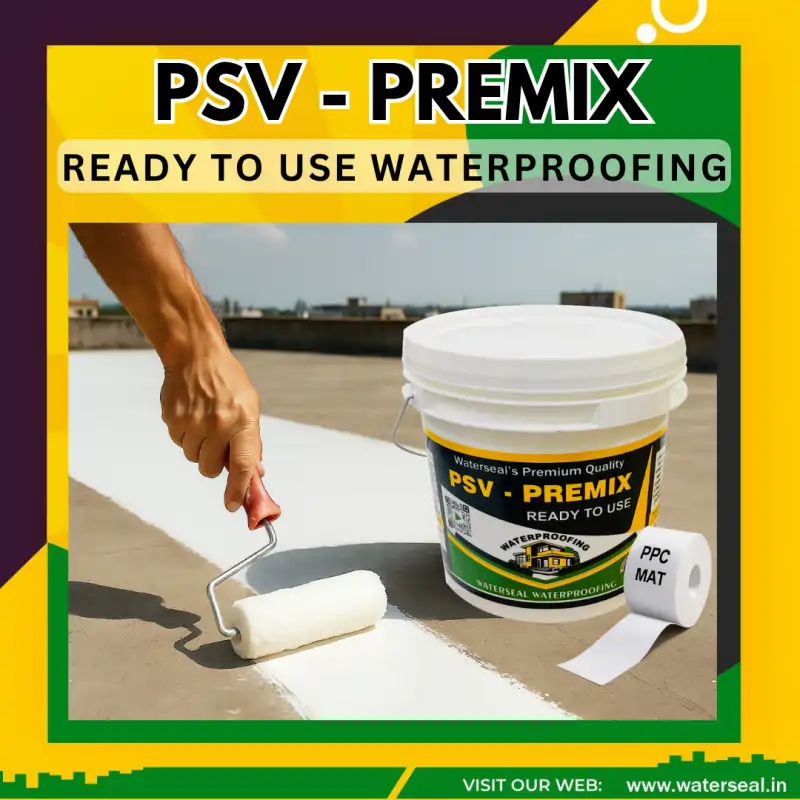
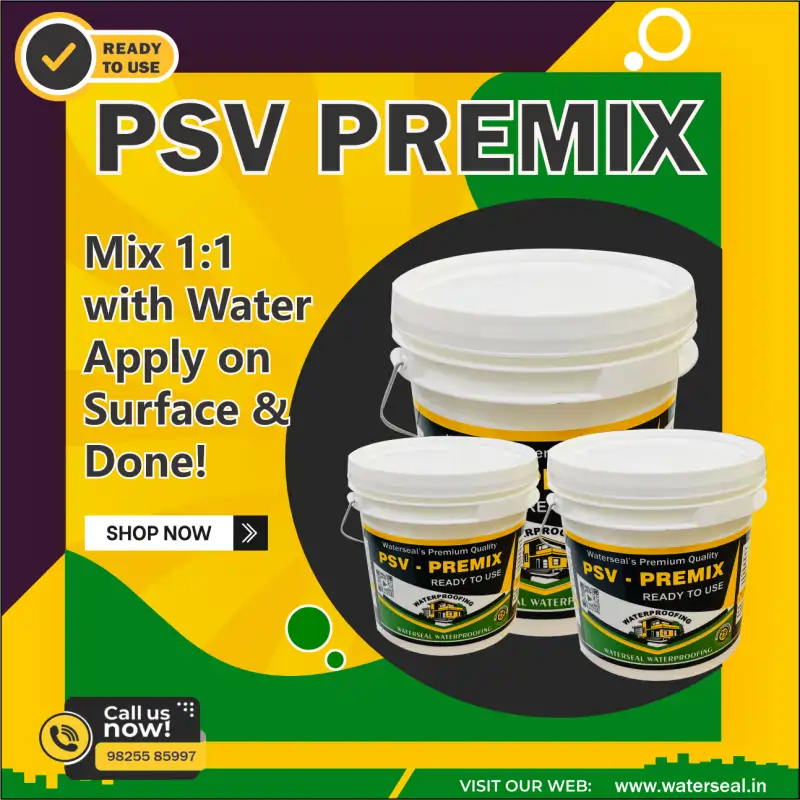
Waterseal PSV – Premix (Best waterproofing chemical for terrace)
PPC Mat crack sealant
Paint roller or brush and Clean water
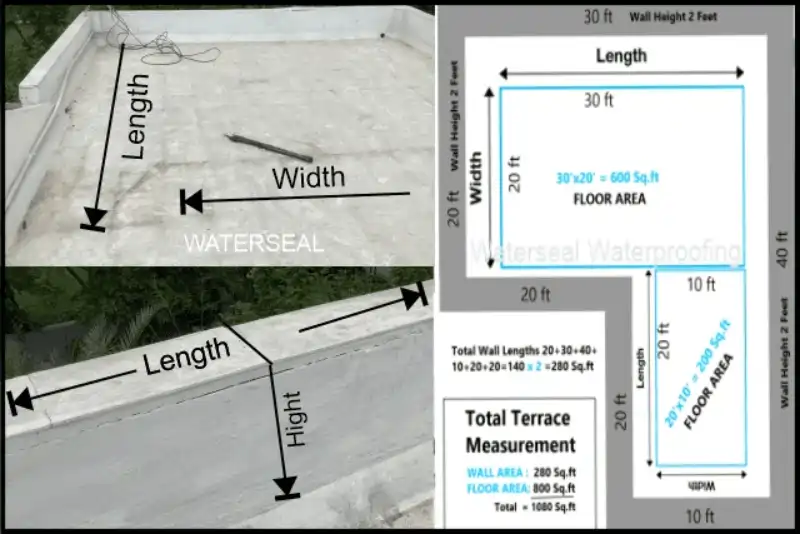
How to Calculate the Terrace Area for Waterproofing
To get full waterproofing, measure the entire terrace including all four side walls. Water can seep in from any corner, so partial coverage is not recommended.
1.Measure the length and width of the terrace using a tape measure.
2. Multiply length × width to get the total square feet
5 Easy Steps to Stop Roof Leakage: A DIY Guide
If you are wondering how to stop leakage from roof without hiring expensive contractors, follow our proven 5-step method. Using Waterseal PSv Premix, anyone can achieve professional results at a very low cost.
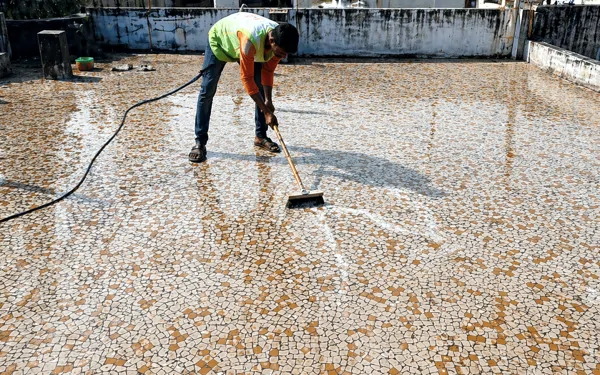
Step 1: Thorough Surface Cleaning
The first secret to successful terrace waterproofing is a clean base. You must remove all dirt, dust, algae, and loose cement flakes.
Action: Use a wire brush or a scraper to clean the floor.
Pro Tip: For the best bond, the surface must be 100% dry and solid. If the surface is dusty, the chemical will not stick properly, leading to future leaks.
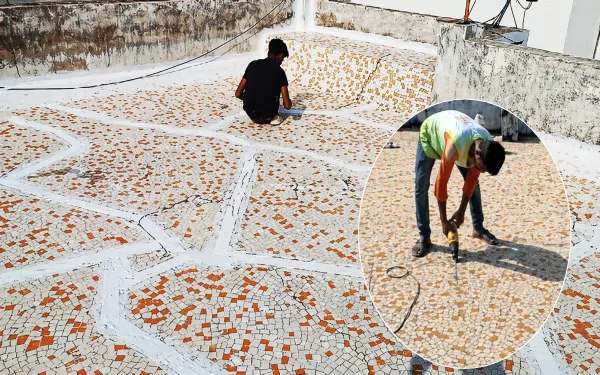
Step 2: Crack Identification and Preparation
Visible cracks are the main entry points for water. You need to open these cracks to fill them deeply.
Action: Use a grinder or hand tools to widen cracks into a ‘V’ shape.
Safety Warning: Using a grinder requires skill. If you are not comfortable, always ask an experienced technician to handle power tools. Removing loose debris from inside the cracks is essential for a permanent fix.
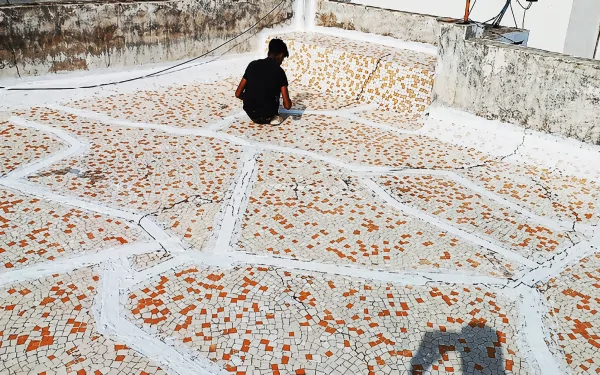
Step 3: Reinforcing Joints and Major Cracks
Standard coating is often not enough for corners and joints. These “critical zones” need extra strength to handle heat expansion.
Action: Apply PSv Premix directly on the cracks, boundary joints, and pipe outlets.
Reinforcement: Place a PPC Crack Mat (mesh) over the wet chemical and press it down. This ensures that the joints stay sealed even if the building moves slightly due to temperature changes.
Step 4: Applying the Waterproofing Primer (Base Coat)
The primer coat is designed to penetrate deep into the slab and seal hairline cracks.
Mixing Ratio: Mix 1 part PSv Premix with 2 parts water.
Application: Use a broom or a large brush to spread the solution evenly. This liquid layer reaches deep inside the pores of the concrete, creating a strong foundation for the next steps.
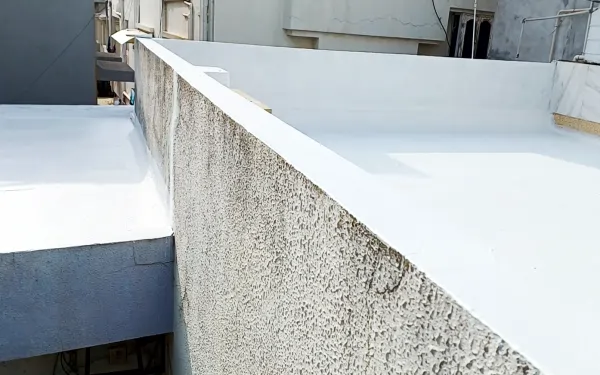
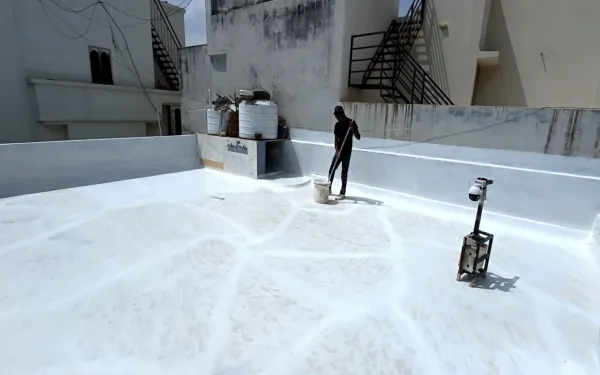
Step 5: Final Dual-Layer Waterproofing Coating
The final step is to create a thick, rubber-like waterproof shield over the entire terrace.
Mixing Ratio: Mix 1 part PSv Premix with 1 part water.
First Coat: Apply using a roller or brush. Let it dry completely for 1–2 hours.
Second Coat: Apply the second layer in a cross-direction to the first one. This double-layer method provides long-lasting protection and ensures your roof remains leak-proof for years.
Note for Homeowners: You can easily supervise a local painter to do this work. By following these specific instructions, you ensure the work is done perfectly without paying high market rates for “experts.”

How Much Waterproofing Material Do You Need?
Waterseal PSV – Premix Coverage:
5 Kg → 50–60 sq. ft (3 coats)
10 Kg → 100–120 sq. ft
25 Kg → 250–280 sq. ft
50 Kg → 500–600 sq. ft
100 Kg → 1000–1200 sq. ft
Use the right quantity to ensure complete roof leak prevention.
PPC Mat for Roof Crack Joints
High-quality waterproof crack joint tape
Waterproof, moisture-proof, flexible, lightweight, non-combustible, and non-toxic
Ideal for sealing cracks and wall-roof joints
✅ To stop leakage from roof effectively, start by cleaning the surface thoroughly to remove dust and debris. Next, widen any cracks and seal them using Waterseal PSv Premix and PPC Mat for extra strength. For the coating, first apply a primer (1 part chemical + 2 parts water) to penetrate deep into the slab. Once dry, apply two main coats (1 part chemical + 1 part water) using a brush or roller, allowing 1–2 hours between each layer. This DIY method is affordable, durable, and provides long-lasting protection against all weather conditions without needing an expert.
Frequently Asked Questions (FAQs) – DIY Terrace Waterproofing Guide
What is the best DIY terrace waterproofing chemical?
The best DIY terrace waterproofing chemical is PSV Premix (Polymerized Silicone Vinyl). It is cost-effective, durable, UV-resistant, heat-reflective, and suitable for Indian weather conditions.
How do I waterproof my terrace by myself?
You can waterproof your terrace by following a 5-step DIY process: clean the surface, seal cracks, apply a waterproofing primer, seal joints with PPC Mat, and apply two coats of PSV Premix for long-lasting protection.
How much PSV Premix do I need for my terrace?
Coverage depends on the terrace size:
5 Kg → 50–60 sq. ft (3 coats)
10 Kg → 100–120 sq. ft
25 Kg → 250–280 sq. ft
50 Kg → 500–600 sq. ft
100 Kg → 1000–1200 sq. ft
Visit this Post – https://watersealwaterproofing.com/how-to-measure-the-terrace/
Can I hire a painter instead of doing it myself?
Yes, any experienced Houses painter can apply PSV Premix correctly. However, supervising the process yourself ensures proper coverage, correct mixing ratios, and a long-lasting waterproofing solution.
Why is terrace waterproofing important?
Terrace waterproofing prevents roof leakage, cracks, dampness, and structural damage. It also increases the lifespan of your terrace and avoids costly repairs in the future.
Protect your home or commercial property from terrace leakage, cracks, and water seepage with our waterproofing solutions. → DIY Waterproofing Guide
Signs of a Leaky Home: Does Your House Need Waterproofing?
Best Terrace Waterproofing Chemicals for Long-Lasting Protection
DIY Terrace Waterproofing: How to Stop Roof Leakage by Yourself
Terrace Outlet Pipe Core Filling with Non-Shrink Grouting Solution
Waterproofing Tips Based on cracks, leakage & slab condition.
Need Reliable Terrace Waterproofing Solutions?
Want to fix leakage or damp walls on your own? With Waterseal’s DIY terrace waterproofing, you don’t need a contractor! Our ready-to-use products and step-by-step guidance make it easy for anyone to waterproof their home.
Have questions or need help getting started?
Message our expert team on WhatsApp for free guidance and product support.